
Landscape lighting isn’t complex. You just place a bunch of lights in your yard, right?
As Dwight Schrute would say, “False.”
Outdoor lighting involves more than just choosing pretty fixtures—it’s a complex dance of understanding the right types of lights, grappling with voltage decisions, and ensuring your setup can weather the storms, quite literally.
In this comprehensive guide, we’ll cover everything you need to know about outdoor lighting, from selecting fixtures and understanding wiring to why sometimes the best call to make is to a professional.
Selecting the Right Type of Lighting
With landscape lighting, one size definitely does not fit all. The secret to creating the perfect atmosphere lies in understanding the different types of lighting and their specific uses.
Let’s break them down:
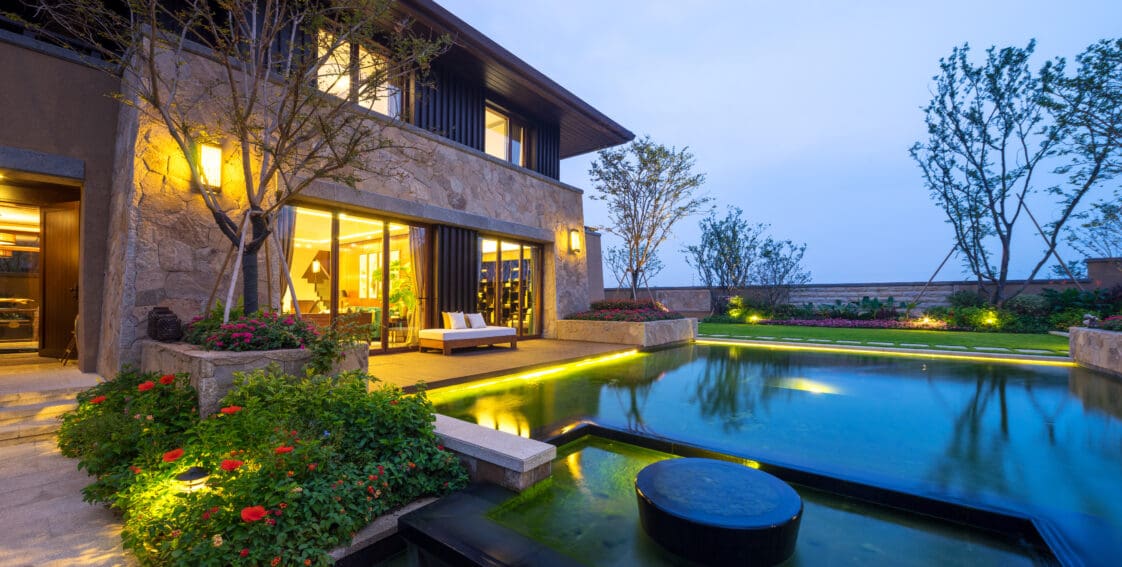
Ambient Lighting
This is your go-to for overall outdoor illumination. Think wall lights, post lights, and hanging fixtures. They’re like the background music at a party—setting the mood without stealing the show. Ambient lighting is ideal for general visibility in your outdoor spaces, providing a warm, inviting glow.
Task Lighting
As the name suggests, this lighting services a specific purpose. Task lights include deck lights, pathway lights, and security lights. These are like the spotlight on the stage—they direct attention exactly where it’s needed, ensuring safety and functionality in areas like walkways, driveways, and entryways.
Accent Lighting
Accent lighting includes spotlights, landscape kits, and in-ground fixtures. This is where you can get really creative. They’re used to highlight your home’s architectural features or draw attention to special landscaping elements. Accent lighting is ultimately the final touch that brings your outdoor space to life.
Factors to Consider When Selecting Lighting
- Purpose: What’s your goal? Is it to light a path, highlight a garden feature, or add security?
- Intensity & Color Temperature: Brightness and color temperature can dramatically affect the mood of your space. Soft, warm lights create a cozy, welcoming atmosphere, while brighter, cooler lights are ideal for security and task lighting.
- Architecture: Whether you have a modern or classic Victorian home, ensure the fixtures you choose blend with your home’s overall aesthetics. For example, if you choose sleek metal fixtures that feature a lot of sharp angles, they may clash with the intricate and ornate nature of an old Victorian home. Likewise, fixtures with highly intricate or rustic designs might look out of place in a modern home. Additionally, warm and yellow lights are well-suited for older homes, while cool, white lights look better in modern homes.
- Energy Efficiency: LED lights are typically more energy-efficient and provide longer lifespans. Solar-powered lights are also a great choice.
Understanding Voltage Compatibility
Mismatching voltage compatibility isn’t just a minor oopsie—it’s a serious misstep. A mismatch can lead to electrical hazards—think less disco lights and more emergency signals. Using a light fixture with a voltage requirement higher than what your power source provides can potentially damage the fixture. On the other hand, overpowering a light fixture can lead to overheating and shorten the bulb’s lifespan. Ensuring the correct voltage keeps the lights on without dramatic sparks or unexpected surprises.
Outdoor lighting systems typically come in two voltage types: low-voltage (usually 12V) and line voltage (around 120V). Low-voltage lighting is typically popular in homes, but line voltage may be necessary for larger and more powerful setups.
Lastly, if you’re using low-voltage landscape lighting, you’ll need a transformer to convert your home’s standard line voltage down to the lower voltage required by the fixtures. Selecting a transformer that can handle the total wattage of all your lights combined is crucial for the system to work correctly.
Finding Outdoor-Friendly Lights

While we appreciate Mother Nature, she isn’t exactly known for being forgiving. That’s why it’s important to choose outdoor fixtures that are marketed as weather-resistant.
Imagine installing a beautiful set of lights, only to watch them perform a vanishing act at the first sign of a storm—not exactly the magical evening you had in mind.
Lights that are not weather-resistant are more susceptible to water damage, leading to issues like rust, short-circuiting, or even complete failure. And in the winter, they won’t be able to withstand the freezing temperatures, leading to cracking and breaking. Over time, UV lights can also degrade materials of non-resistant fixtures, causing them to fade or become brittle.
Knowing Maintenance Requirements
Luckily, most outdoor lights are low-maintenance. All you need to do is clean them and inspect them frequently for signs of damage.
Over time, lights can accumulate a fascinating collection of bugs, dust, and the occasional cobweb. A gentle wipe-down with a soft cloth or a brush is pretty much all you need to do. For glass parts, a bit of soapy water can help maintain that crystal-clear shine. Just be sure to avoid harsh chemicals that might ruin your fixtures’ finish.
As far as the inspections go, you’ll want to periodically take a stroll to check for rust, loose fixtures, or damaged/messy wiring and replace any bulbs as needed.
Creating an Outdoor Lighting Placement Plan

When you place lights in your yard, you’re not just setting them in spots willy-nilly—you need to have a purpose and goal in mind. Maybe that goal is to emphasize your blooming cherry tree, or perhaps to improve safety on the pathway to your front door—whatever it is, your purpose will guide which lights you choose and where to place them. For example, motion sensors and timed lights can be great for improving home security and safety, while decorative lanterns and spotlights can be good for highlighting different areas of your home.
Beyond purpose and function, focus on these factors when creating your placement plan:
Key Landscape Features
What do you consider your landscape’s most prized feature? Is it that old oak tree? Or maybe that cool mushroom statue you found at Goodwill? Make a list of the features in your yard that you would want people to notice immediately. Then, use spotlights, pathway lights, flood lights, or other accent lighting to make it happen.
Balance
Do you want your landscape to look welcoming and inviting, or like every feature in your yard is being interrogated by the police? Placement is key to achieving the former.
Use the layered lighting approach—combine ambient lighting with task and accent lighting. So, use softer lights for general area illumination and brighter ones for areas that you want to emphasize, like walkways or your entryway.
You should also avoid clustering lights too closely in one area—if you’re using pathway lights, give five to eight feet of space between each light and keep them at least a foot away from your path. You can also test lights at different heights and angles to add depth and character.
Wiring & Power
It would be a real bummer to create an entire lighting plan only to find that you don’t actually have power sources where you want to place your lights. Before you create your plan, do a walkaround and figure out where your power sources are and how wiring would work. If wiring is a challenge, solar-powered lights might be a good alternative.
Avoiding Light Pollution
Do you have any astrophotographers in your neighborhood? They’ll appreciate it when you think of them! Position lights so they illuminate your property without spilling over onto neighboring properties or into the night sky, and always use fixtures designed to minimize glare. Even if you don’t have neighbors who are into astrophotography, they’ll still love not having a floodlight shine into their bedroom window at 1 a.m.
Figuring Out Wiring
Wiring is where the magic happens, but it’s also where things can get tangled, both literally and figuratively.
To avoid turning your space into an unintentional obstacle course, use these strategies:
- Plan Your Wiring Layout: Remember the lighting placement plan we discussed earlier? In addition to mapping out where each light will go, you need to map the wiring route. Consider the most direct paths for wiring to reduce excess and the potential for tangles. Remember, the shortest distance between two points is a straight line.
- Use the Right Type of Wire: Use wiring specifically designed for outdoor use. It should be weather-resistant and durable enough to handle temperature changes and moisture. The gauge of the wire should also be appropriate for the electrical load of your lights.
- Bury or Conceal Wires: You can prevent trips and falls and damage to your wiring by burying wires. Use a wire trencher or garden spade to dig a shallow trench (about six inches deep), lay the wire, and then cover it back up. If burying isn’t feasible, use weather-resistant cable covers to conceal and protect the wires.
- Opt for Wireless or Solar Options: Maybe you want to sidestep the wiring issue altogether—that’s totally fine! You can use wireless or solar lights. These options are more flexible and less invasive, especially for lighting faraway corners of your garden or areas where wiring would otherwise be challenging.
- Leave Some Slack: When laying out your wires, leave a little bit of slack at each lighting fixture to accommodate movement from soil setting or seasonal changes. This prevents undue tension on the wires and connectors.
- Label & Organize: If you have a complex lighting system, labeling wires and keeping a reference map can be incredibly helpful for future maintenance or adjustments. This way, you won’t be left guessing which wire goes where and having a complete Nicolas Cage-esque mental breakdown during troubleshooting or expansion projects.
DIY Versus Professional Installation

Is hiring a professional worth it? Maybe you’re already a handyman, or maybe you’re not, but you know that you can confidently replace a lightbulb, and how hard can it be to install a light outdoors anyway?
Sometimes DIY landscape lighting installations can go well, and sometimes they turn out like Clark Griswold sliding down a ladder. We’re not here to stop you from installing your outdoor lights—we just want you to know what could go wrong and why it’s okay to give in and ask for help sometimes.
The Common Pitfalls of DIY
- Improper Wiring: You don’t necessarily need to be an electrician to install outdoor lights, but you do need to understand how to choose wiring. We’ve already mentioned this, but it never hurts to repeat it: incorrect wiring can lead to short circuits, flickering lights, or even electrical fires.
- Incorrect Fixture Placement: Without proper planning, you could place lights in less-than-ideal locations, leading to poor illumination, glare, or uneven lighting (remember your neighbors!).
- Overlooking Safety Standards: Even if you have the best intentions, you may still violate safety codes or use materials not rated for outdoor use, posing risks of shock or damage during inclement weather.
- Underestimating Project Scope: So many DIY projects start out as “This will be simple!” until it quickly turns into obstacle after obstacle after obstacle. It’s not unlikely you may find yourself overwhelmed with project scope, especially if you have a big yard and house, leading to an unfinished or delayed project.
How a Professional Can Help
Professionals like Brilliant Nights Design can help you do more than just turn on the lights. When you call us, we can:
- Provide placement recommendations.
- Help you design your landscape lighting plan.
- Suggest lighting types based on goals, the features you want to accent, and your home’s style/architecture.
- Ensure your lighting system adheres to local building codes and safety standards.
- Prevent electrical issues.
- Pick out the best materials/lights to ensure system longevity.
Essentially, we do all the hard work for you—all you need to do is sit back and enjoy the show.
Get Professional Help From Brilliant Nights Design
What landscape lighting ideas do you have? Our team at Brilliant Nights Design would love to hear them! We can even provide free night demos so you can really see what your system will look like before you commit to it. Contact us today to schedule your first consultation.